
The golden hour in photography refers to that magical time shortly after sunrise or before sunset when the sun casts a warm, golden hue across the landscape. For outdoor enthusiasts and photographers alike, this fleeting window presents unparalleled opportunities to capture breathtaking images of trails, campsites, and natural landscapes. The soft, directional light during this period creates depth, minimizes harsh shadows, and bathes everything in a dreamy glow that can transform an ordinary scene into something extraordinary. Whether you’re a seasoned photographer or simply looking to document your outdoor adventures more effectively, understanding how to harness the power of the golden hour can dramatically elevate your trail and campsite photography.
Understanding the Golden Hour Phenomenon
The golden hour occurs when the sun is positioned low in the sky, typically during the first hour after sunrise and the last hour before sunset. During these times, sunlight travels through more of the Earth’s atmosphere than when the sun is higher in the sky, causing the blue light to scatter and allowing the warmer red, orange, and gold tones to dominate. This scientific phenomenon creates naturally filtered light that flatters landscapes and subjects alike. The exact timing of the golden hour varies depending on your geographical location, the season, and local weather conditions. Numerous photography apps are available that can calculate precise golden hour times for your specific location, helping you plan your shoots with greater accuracy. Understanding this timing is crucial as the golden hour can last anywhere from 40 minutes in tropical regions to several hours in areas closer to the poles during certain seasons.
Essential Camera Gear for Golden Hour Trail Photography
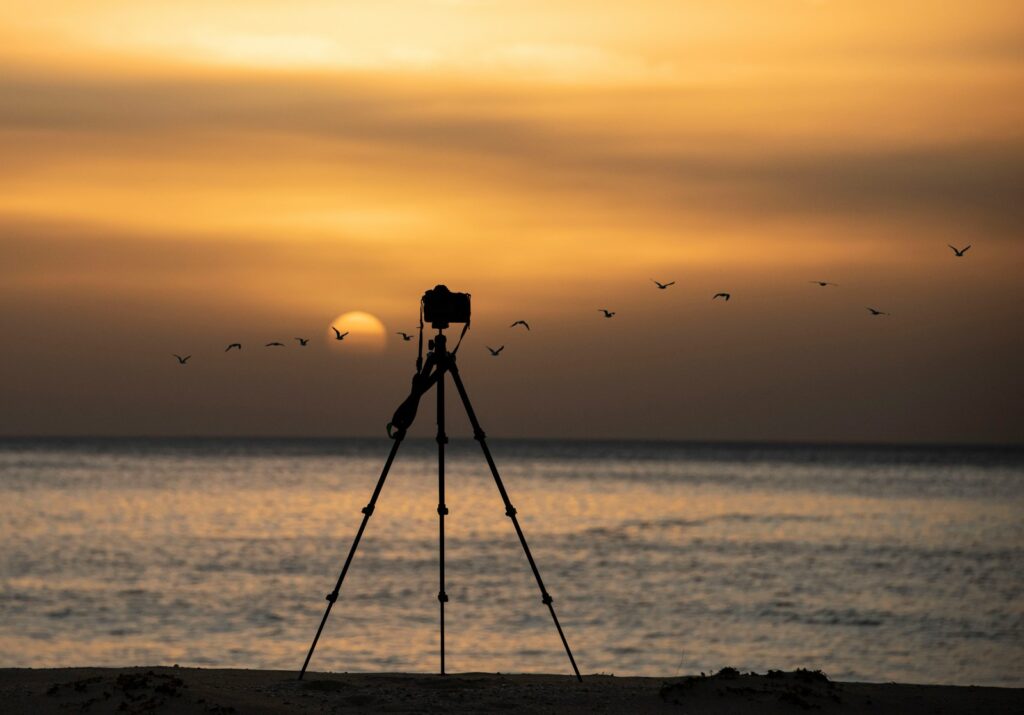
While the golden hour provides beautiful natural lighting, having the right equipment will help you make the most of these fleeting moments. A sturdy tripod is perhaps the most essential piece of gear, as it allows for longer exposures without camera shake during the lower light conditions. A wide-angle lens (16-35mm range) is ideal for capturing expansive trail views and dramatic landscapes, while a medium telephoto lens (70-200mm) helps isolate distant features bathed in golden light. Don’t forget to pack extra batteries, as cold morning temperatures can drain them quickly, and memory cards to ensure you don’t run out of storage during the perfect light. Consider bringing a polarizing filter to manage reflections and enhance the saturation of golden hour colors, particularly useful when photographing scenes with water or foliage. A graduated neutral density filter can also help balance exposure between bright skies and darker foregrounds, a common challenge during golden hour shooting.
Planning Your Golden Hour Photography Expedition
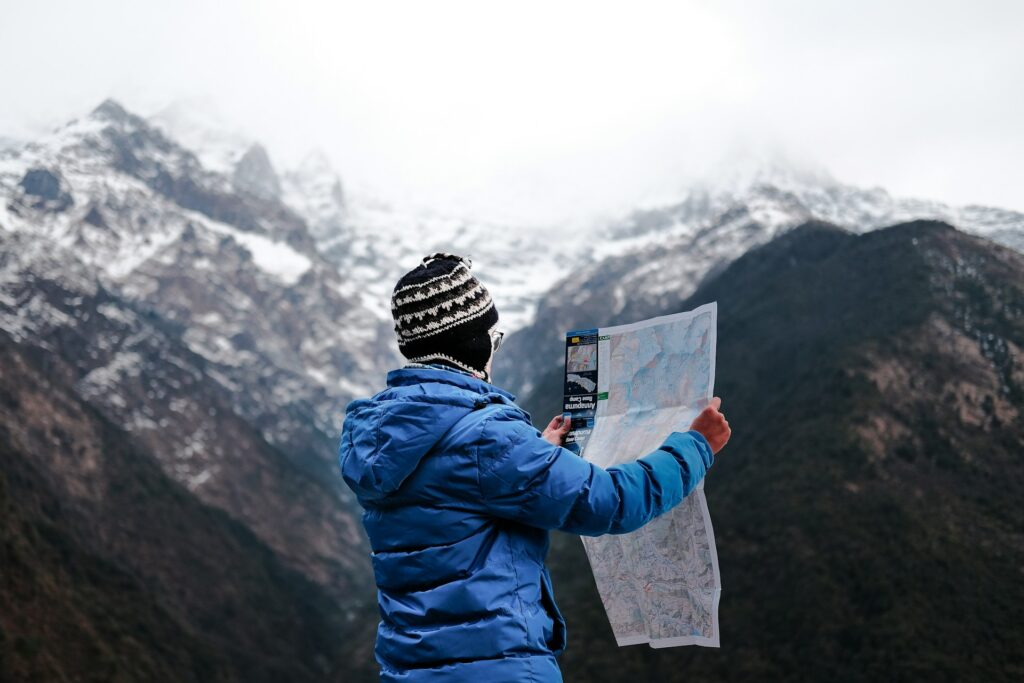
Successful golden hour photography on trails and at campsites requires careful planning well before you press the shutter button. Begin by researching your location thoroughly, identifying potential vantage points and compositions that will work well with directional light from the east (morning) or west (evening). Scout your location in advance when possible, making note of how the light falls and identifying any obstacles or safety concerns. Weather forecasting plays a crucial role in planning; look for days with clear or partially cloudy skies, as clouds can either enhance the golden light with dramatic reflections or block it entirely. Create a shot list prioritizing your must-have images, as the golden hour passes quickly and you’ll want to maximize every minute. Remember to factor in hiking time to reach remote locations, always allowing extra time to set up your equipment before the optimal light arrives.
Composing Trail Shots During Golden Hour

Trail photography during the golden hour offers unique compositional opportunities that aren’t available at other times of day. Look for leading lines created by the trail itself, which can draw the viewer’s eye through the frame when illuminated by side-lighting. Position yourself to capture the interplay between light and shadow as golden rays filter through trees or highlight the texture of the path. The rule of thirds remains a valuable guideline—place the horizon line along the upper or lower third of your frame rather than directly in the center, creating a more dynamic image. Include foreground elements like interesting rocks, wildflowers, or trail markers to add depth and context to your compositions. When photographing hikers or fellow campers on the trail, position them so the golden light illuminates them from the side or behind (backlighting), creating a warm glow around their silhouette that adds drama and emotion to the scene.
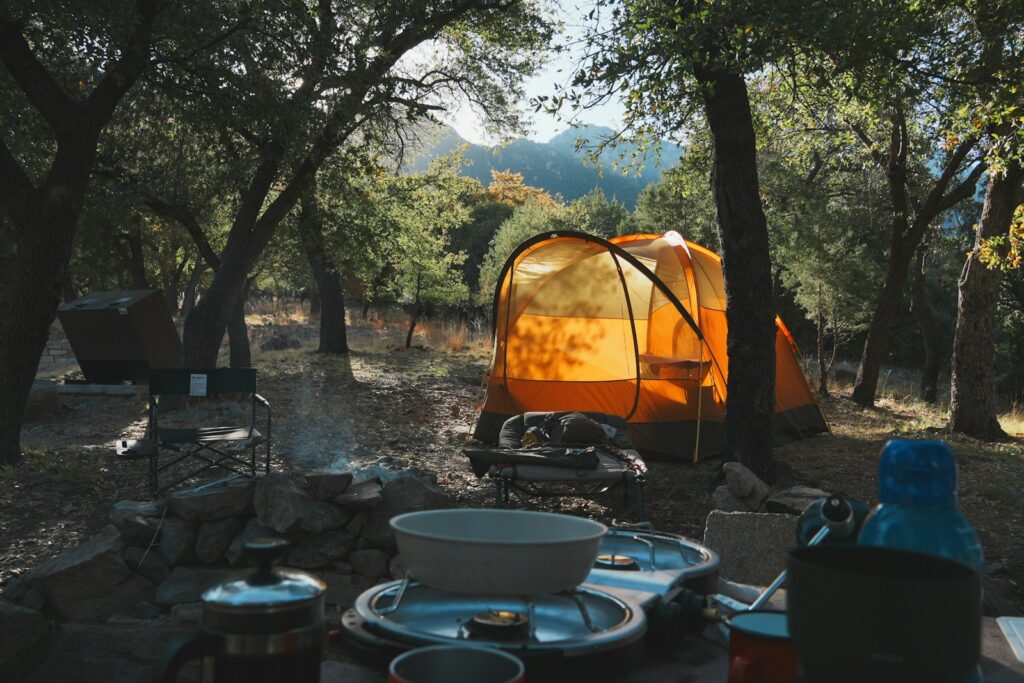
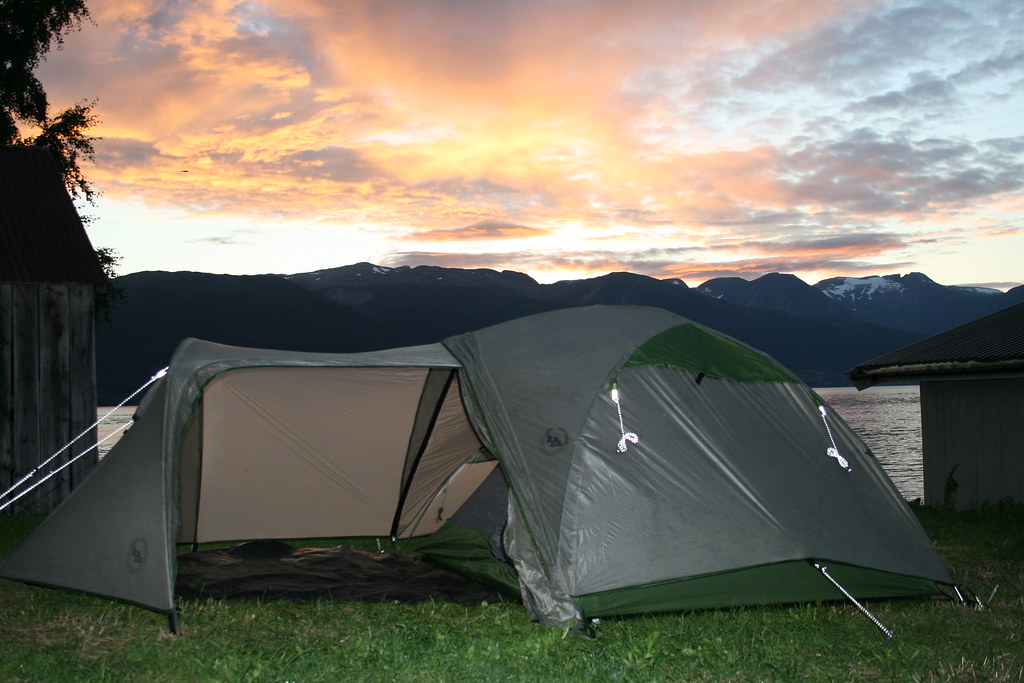
Mastering Campsite Photography in Golden Light
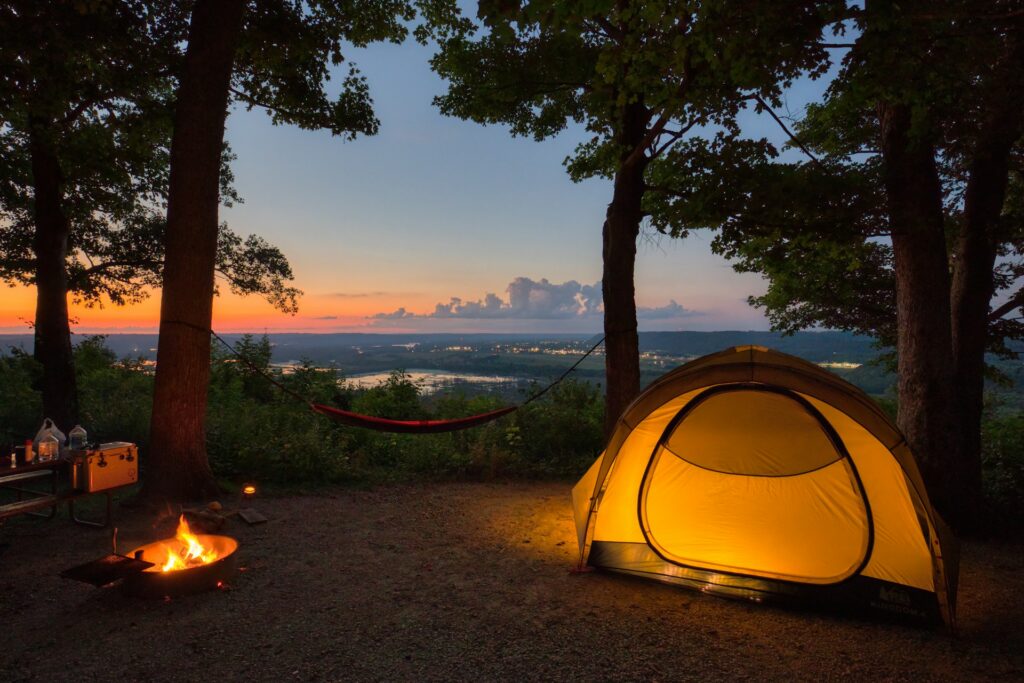
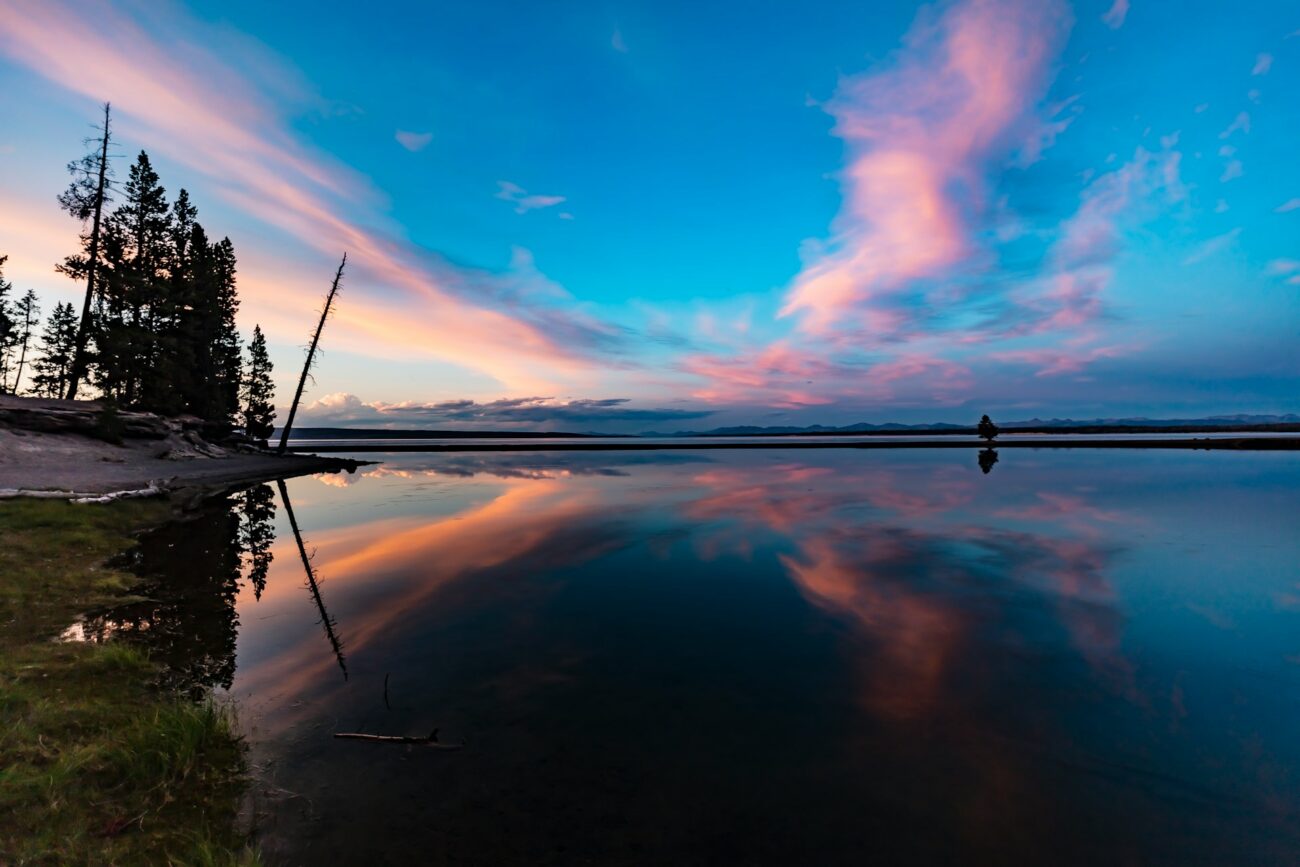
Campsites offer a wealth of photographic opportunities during the golden hour, combining natural beauty with human elements in a way that tells a compelling story. Position your tent strategically with consideration for how the rising or setting sun will illuminate it—a tent glowing from within as the golden hour fades into dusk creates a particularly magical image. Capture the routine activities of camp life bathed in warm light: coffee brewing over a morning fire, gear being prepared for the day’s adventure, or friends gathering to share stories as the day ends. Look for reflections in nearby water bodies that can double the impact of golden hour colors and create mirror-like compositions. Don’t forget to document the small details that make camping special: dew-covered gear in morning light, the texture of camp food being prepared, or equipment arranged against the backdrop of a colorful sky.
Utilizing Backlighting Techniques
Backlighting—positioning your subject between your camera and the light source—is particularly effective during the golden hour and can create stunning trail and campsite images. This technique creates a beautiful rim lighting effect where subjects are outlined with a golden glow, adding dimension and separation from the background. When photographing people, backlighting creates a halo effect around hair and clothing that adds a magical quality to portraits in nature. For plant life along trails, backlighting illuminates leaves, grasses, and flowers from behind, revealing intricate structures and translucent qualities not visible in other lighting conditions. To manage exposure when shooting backlit scenes, spot meter for your main subject or use exposure compensation to prevent silhouetting (unless that’s your creative intention). Remember that lens flare is common when shooting toward the light source, so using a lens hood or your hand to shade the front element can help control unwanted flare, though sometimes incorporating flare can add to the golden hour aesthetic.
Capturing Dynamic Range Challenges
One of the greatest challenges of golden hour photography is managing the wide dynamic range between bright skies and darker foreground elements. The human eye can perceive this range naturally, but cameras often struggle to capture both extremes in a single exposure. Bracketing exposures—taking multiple shots of the same composition at different exposure values—allows you to blend these images later in post-processing for a balanced result. Alternatively, use graduated neutral density filters to darken the sky portion of your image while maintaining proper exposure for the foreground. Modern cameras with high dynamic range capabilities can also help; shooting in RAW format preserves maximum information for post-processing adjustments. When photographing trails cutting through forests, be particularly mindful of the dappled light pattern created when golden light streams through trees, as this presents especially challenging exposure situations that may benefit from HDR techniques. Remember that slightly underexposing your image can preserve highlight details that would otherwise be lost, and shadow areas can often be recovered in post-processing.
Working with Golden Hour Colors
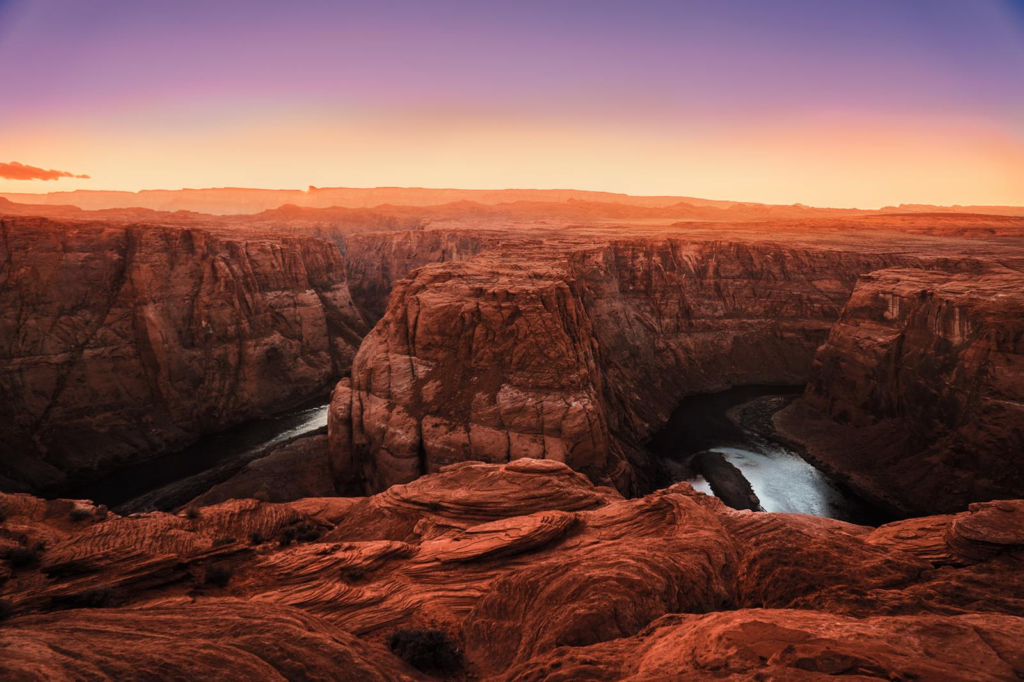
The distinct color palette of the golden hour—ranging from deep ambers to soft pinks and purples—provides a natural enhancement to outdoor photography that can be further optimized through thoughtful camera settings. Setting your white balance to the “Daylight” or “Sunny” preset rather than auto can help preserve the warm tones rather than having your camera attempt to neutralize them. Consider adjusting your camera’s picture style or profile to enhance vibrancy without oversaturating—the “Landscape” preset often works well for trail photography during golden hour. Pay attention to complementary colors in the landscape; blue sky elements create beautiful contrast with the warm golden tones of sunlit terrain. Forest trails offer particularly rich color opportunities as the golden light illuminates foliage from different angles, creating a tapestry of greens, yellows, and browns. Remember that different seasons offer varied color palettes during the golden hour—spring brings fresh greens, summer offers lush saturation, fall creates stunning combinations with changing leaves, and winter can pair golden light with the cool blues and whites of snow-covered landscapes.
Incorporating Human Elements
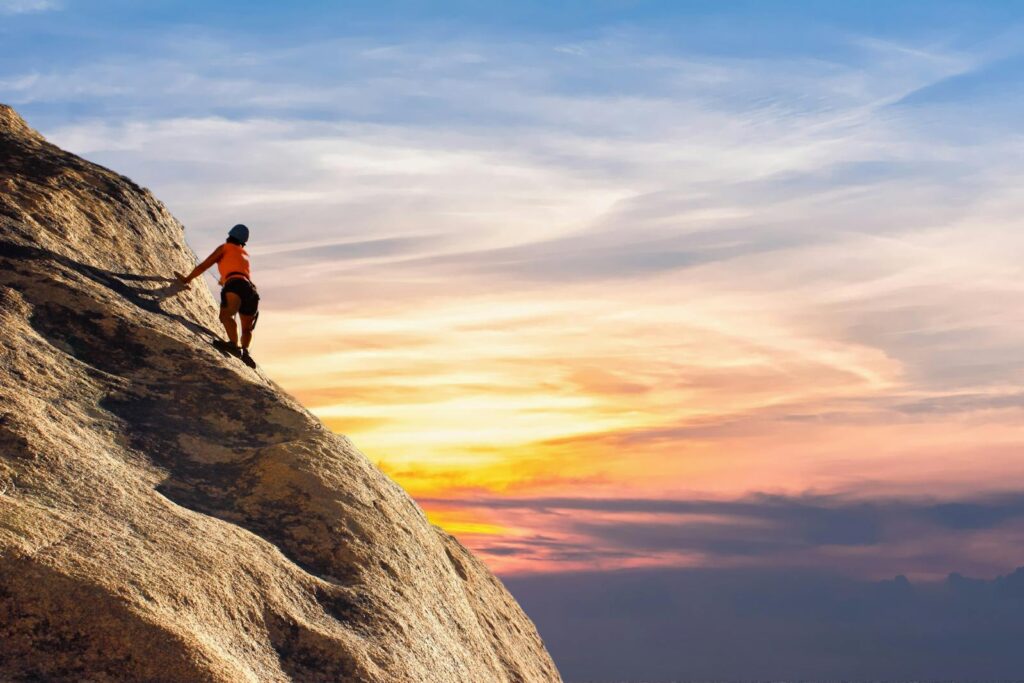
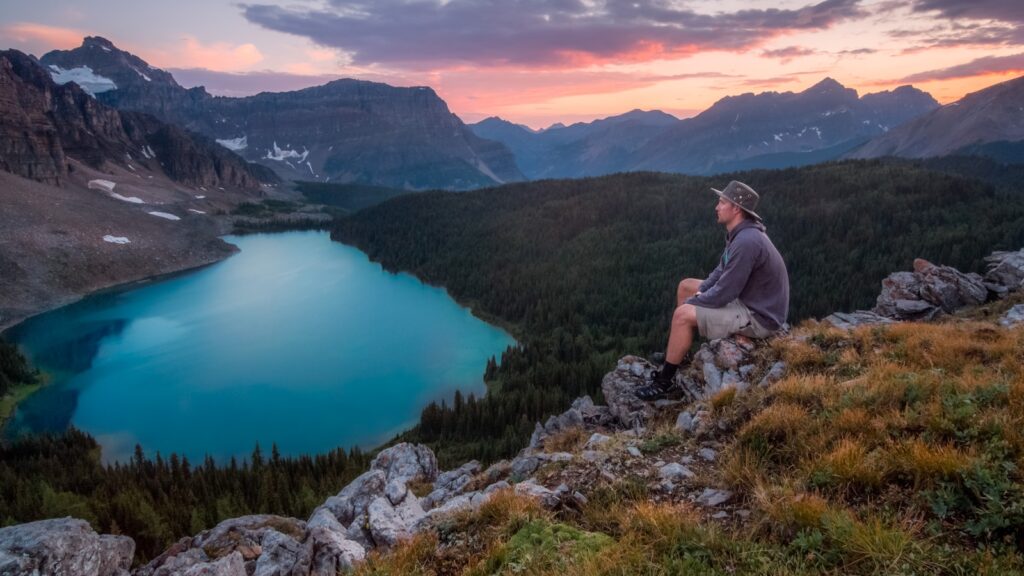
Including people in your golden hour trail and campsite photography adds scale, emotion, and narrative to your images. Position hikers or campers where they’ll be illuminated by the warm side lighting, highlighting their features while connecting them visually to the landscape. Silhouettes work particularly well during golden hour—place your subject against the bright sky on a ridge or overlook to create a dramatic profile that emphasizes the human connection to nature. Capture authentic moments rather than posed shots: a hiker pausing to take in a view, a camper tending to a morning fire, or friends sharing a sunset toast creates images with emotional resonance. When photographing people during golden hour, be mindful of catchlights in the eyes and how the directional light models facial features—having subjects turn slightly toward the light source can create pleasing portraits with natural warmth. Remember that clothing colors interact with golden hour light in different ways; reds, oranges, and yellows will amplify the warm tones, while blues and greens provide complementary contrast.
Night Transition Photography Techniques
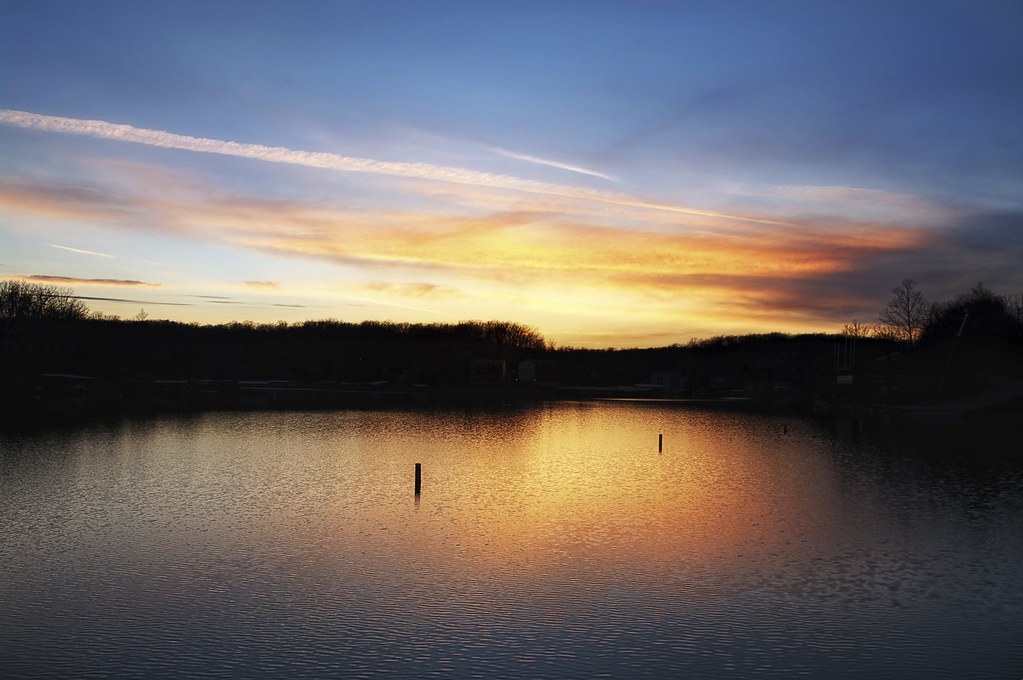
As the golden hour fades into dusk and eventually night, a whole new realm of photographic opportunities emerges at your campsite. The transition period between golden hour and true night—often called “blue hour”—creates a balanced ambient light where the warm glow of a campfire or lantern can complement the deep blue tones of the darkening sky. Long exposure techniques become essential during this transition; secure your camera on a tripod and experiment with exposure times between 1-30 seconds to capture the evolving light. Light painting techniques can add creative elements to your campsite shots; use headlamps or flashlights to selectively illuminate tents, trees, or landscape features during a long exposure. Star photography becomes possible as darkness deepens; prepare for this transition by having your settings ready to adjust (typically high ISO, wide aperture, and exposure times based on the 500 rule to prevent star trailing). The combination of dying embers from a campfire, the last faint glow on the horizon, and the first emerging stars can create uniquely magical images that tell the complete story of a day on the trail.
Adapting to Weather Conditions
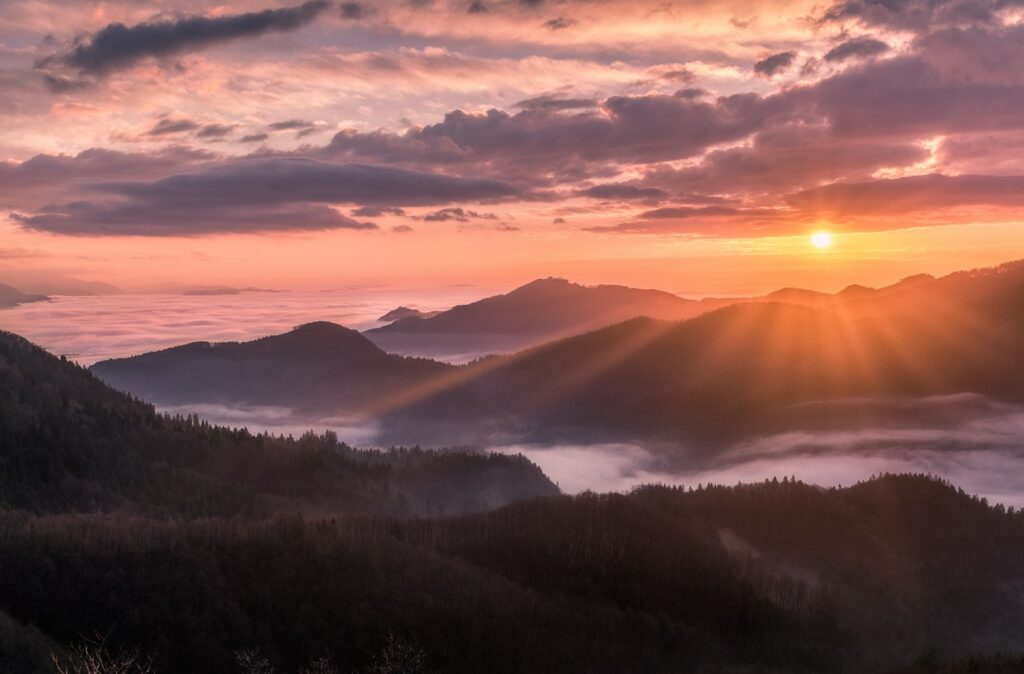
While clear skies offer reliable golden hour conditions, don’t discount the photographic potential of varying weather patterns. Partially cloudy skies often create the most dramatic golden hour images as the clouds catch and reflect the warm light, adding texture and color to the sky portion of your composition. After rain showers, the combination of wet surfaces reflecting golden light and possibly lingering mist can create ethereal trail scenes with enhanced colors and atmospheric depth. Foggy conditions during golden hour produce particularly magical results as shafts of golden light cut through the mist, creating visible light beams that add a mystical quality to forest trails. Even on completely overcast days, don’t put your camera away—the clouds act as a giant diffuser, creating soft, even lighting that’s excellent for photographing details along the trail or intimate campsite moments. Always be prepared for rapid weather changes in outdoor settings by protecting your gear with rain covers and keeping a microfiber cloth handy to wipe condensation from lenses when moving between temperature extremes.
Post-Processing Golden Hour Images
The magic of golden hour can be further enhanced through thoughtful post-processing techniques that preserve and amplify the special qualities of this light. Begin by adjusting white balance to ensure the golden tones are represented accurately—sometimes auto white balance can neutralize the very warmth that makes golden hour special. Use the graduated filter tool in editing software to balance exposure between bright skies and darker foregrounds, mimicking the effect of physical graduated filters. Selective adjustments to vibrance rather than overall saturation can enhance the golden colors without making the image appear artificial or oversaturated. Pay special attention to the clarity and texture sliders, which can bring out the three-dimensional quality of golden light as it rakes across landscape features and trail textures. For more advanced editing, consider luminosity masks to target adjustments to specific brightness ranges within your image, allowing precise control over how the golden light is represented. Remember that restraint is key in editing golden hour images—the goal is to enhance the natural beauty that was present rather than creating an effect that looks unrealistic.
Ethics and Safety in Golden Hour Photography
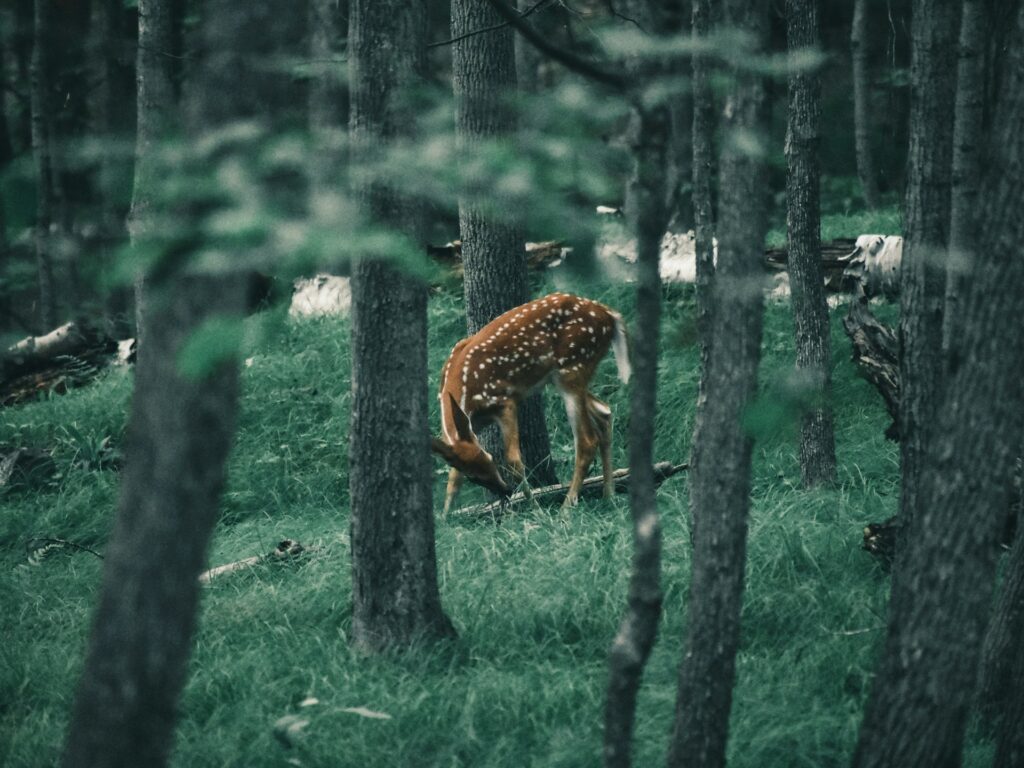
The pursuit of perfect golden hour images should always be balanced with ethical considerations and safety concerns. Always prioritize Leave No Trace principles, avoiding trampling sensitive vegetation or disturbing wildlife to get a shot. Be mindful that dawn and dusk are active times for wildlife; maintain appropriate distances and use telephoto lenses rather than approaching animals for close-ups. Safety becomes particularly important when hiking to or from locations during low light conditions; always carry headlamps with spare batteries, know your route well, and inform others of your plans when photographing in remote areas. Consider the impact of your photography on others’ wilderness experience—using drones during golden hour may capture amazing aerial perspectives but can disturb the natural quiet that many seek in outdoor settings. Remember that some popular photography locations can become crowded during golden hour; respect other photographers’ space and take turns at prime vantage points. Finally, while sharing locations on social media can inspire others, consider the potential impact of increasing visitor numbers to sensitive or lesser-known areas—some locations may benefit from more general location tags rather than specific coordinates.
The golden hour offers a magical window of opportunity for trail and campsite photography, transforming ordinary outdoor scenes into extraordinary visual stories. By understanding the unique properties of this light, preparing the right equipment, composing thoughtfully, and applying appropriate techniques, you can create images that not only document your outdoor adventures but also capture the emotional essence of these experiences. Remember that while technical mastery is important, the most compelling golden hour photographs often come from a genuine connection to the landscape and a willingness to adapt to the ever-changing conditions nature provides. So pack your camera alongside your hiking boots and camping gear, set your alarm for those early mornings, and position yourself to witness the transformation that occurs when the world is bathed in golden light. The results will be well worth the effort, creating lasting visual memories of your time on the trail.